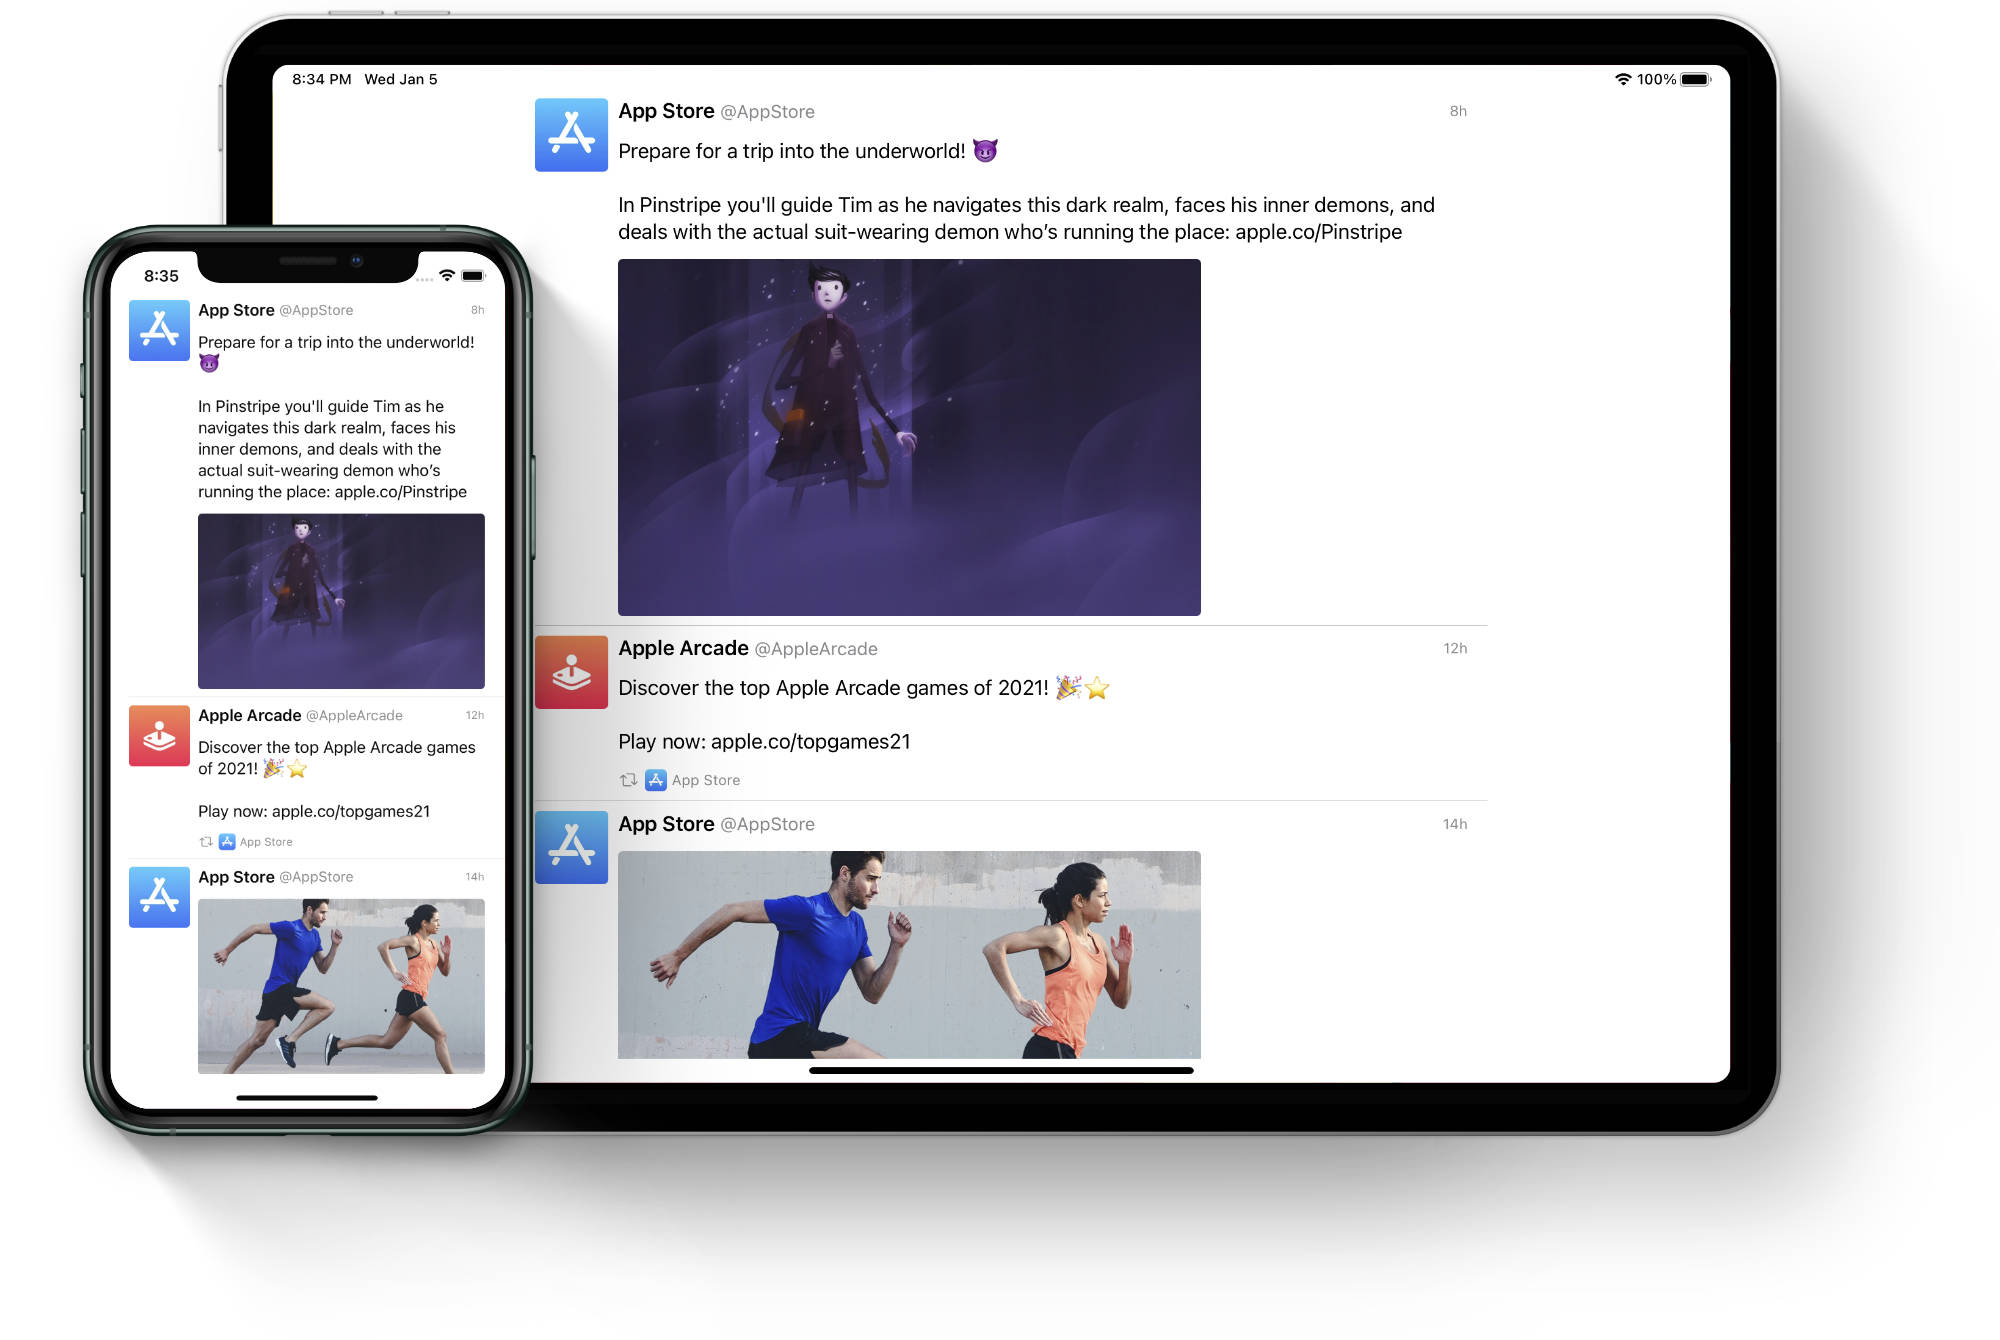
In this example we are going to build a simplified Twitter timeline to see how to use a table view with self–sizing cells.
Overview
The cell displays the tweet’s author avatar and names along with the date. The content can display text only, media only (image), or both (we assume either the text or image is available). To keep things simple, our cell will only support a single media object. If the tweet has been retweeted, we show a little indicator view at the bottom with the info about the user who made the retweet.
Create a new iOS project in Xcode or open the starting project for this example, it is available on GitHub.
View model
Let’s start by defining our view model. We’ll define Tweet enum to namespace our models and add User model first:
enum Tweet {
    enum User {
        struct ViewModel {
            let username: String
            let displayName: String
            let avatar: UIImage?
        }
    }
}
Next we’ll add model for the media object to hold a reference to the image and its size which is always available when using the official Twitter API:
enum Tweet {

    ...

    enum Media {
        struct ViewModel {
            let image: UIImage?
            let size: CGSize
        }
    }
}
Finally we add a model for the tweet itself. We make it conform to the Hashable protocol to be able to use it with the diffable data source:
enum Tweet {

    ...

    struct ViewModel: Hashable {
        let id: UUID
        let date: String
        let author: Tweet.User.ViewModel
        let text: String?
        let media: Tweet.Media.ViewModel?
        let retweetedBy: Tweet.User.ViewModel?

        func hash(into hasher: inout Hasher) {
            hasher.combine(self.id)
        }

        static func == (lhs: Tweet.ViewModel, rhs: Tweet.ViewModel) -> Bool {
            return lhs.id == rhs.id
        }
    }

}
Within the Models.swift file we’ll also create a list of sample tweets to populate our table view. These are five different tweets mixed up a few times to get the table to scroll and see that our cells are laid out properly when reused:
enum SampleModel {
static let user1 = Tweet.User.ViewModel(username: "@AppStore", displayName: "App Store", avatar: UIImage(named: "user_appstore"))
static let user2 = Tweet.User.ViewModel(username: "@AppleArcade", displayName: "Apple Arcade", avatar: UIImage(named: "user_applearcade"))
static let tweets: [Tweet.ViewModel] = [
Tweet.ViewModel(id: UUID(), date: "5h", author: SampleModel.user1, text: "\"We’re trying to use astrology as a jumping-off point for a new kind of reality.\" ✨\n\nWe spoke to @CoStarAstrology founder and CEO Banu Guler about why people turn to the stars, and how to adapt a 4,000-year-old system into an app: apple.co/CoStarAstrology", media: Tweet.Media.ViewModel(image: UIImage(named: "tweet1"), size: CGSize(width: 514, height: 315)), retweetedBy: nil),
Tweet.ViewModel(id: UUID(), date: "8h", author: SampleModel.user1, text: "Prepare for a trip into the underworld! 😈\n\nIn Pinstripe you'll guide Tim as he navigates this dark realm, faces his inner demons, and deals with the actual suit-wearing demon who’s running the place: apple.co/Pinstripe", media: Tweet.Media.ViewModel(image: UIImage(named: "tweet2"), size: CGSize(width: 514, height: 315)), retweetedBy: nil),
Tweet.ViewModel(id: UUID(), date: "12h", author: SampleModel.user2, text: "Discover the top Apple Arcade games of 2021! 🎉⭐️\n\nPlay now: apple.co/topgames21", media: nil, retweetedBy: SampleModel.user1),
Tweet.ViewModel(id: UUID(), date: "14h", author: SampleModel.user1, text: nil, media: Tweet.Media.ViewModel(image: UIImage(named: "tweet4"), size: CGSize(width: 514, height: 315)), retweetedBy: nil),
Tweet.ViewModel(id: UUID(), date: "16h", author: SampleModel.user1, text: "2022 is the year you rethink what yoga can do. 🧘♀️\n\nAsana Rebel is a yoga-inspired workout app that caters to all fitness levels. Even if you don’t know your chakra from your elbow, it can help you lose weight, improve flexibility, and build strength: apple.co/-AsanaRebel", media: Tweet.Media.ViewModel(image: UIImage(named: "tweet5"), size: CGSize(width: 514, height: 315)), retweetedBy: nil),
Tweet.ViewModel(id: UUID(), date: "22h", author: SampleModel.user1, text: "\"We’re trying to use astrology as a jumping-off point for a new kind of reality.\" ✨\n\nWe spoke to @CoStarAstrology founder and CEO Banu Guler about why people turn to the stars, and how to adapt a 4,000-year-old system into an app: apple.co/CoStarAstrology", media: Tweet.Media.ViewModel(image: UIImage(named: "tweet1"), size: CGSize(width: 514, height: 315)), retweetedBy: nil),
Tweet.ViewModel(id: UUID(), date: "1d", author: SampleModel.user1, text: "Prepare for a trip into the underworld! 😈\n\nIn Pinstripe you'll guide Tim as he navigates this dark realm, faces his inner demons, and deals with the actual suit-wearing demon who’s running the place: apple.co/Pinstripe", media: Tweet.Media.ViewModel(image: UIImage(named: "tweet2"), size: CGSize(width: 514, height: 315)), retweetedBy: nil),
Tweet.ViewModel(id: UUID(), date: "1d", author: SampleModel.user2, text: "Discover the top Apple Arcade games of 2021! 🎉⭐️\n\nFrom slam dunks in NBA 2K22 Arcade Edition to stealthy shenanigans in Sneaky Sasquatch, these games had us scoring, battling, and always laughing.\n\nPlay now: apple.co/topgames21", media: nil, retweetedBy: SampleModel.user1),
Tweet.ViewModel(id: UUID(), date: "1d", author: SampleModel.user1, text: nil, media: Tweet.Media.ViewModel(image: UIImage(named: "tweet4"), size: CGSize(width: 514, height: 315)), retweetedBy: nil),
Tweet.ViewModel(id: UUID(), date: "2d", author: SampleModel.user2, text: "2022 is the year you rethink what yoga can do. 🧘♀️\n\nAsana Rebel is a yoga-inspired workout app that caters to all fitness levels. Even if you don’t know your chakra from your elbow, it can help you lose weight, improve flexibility, and build strength: apple.co/-AsanaRebel", media: Tweet.Media.ViewModel(image: UIImage(named: "tweet5"), size: CGSize(width: 514, height: 315)), retweetedBy: SampleModel.user1),
Tweet.ViewModel(id: UUID(), date: "2d", author: SampleModel.user1, text: "\"We’re trying to use astrology as a jumping-off point for a new kind of reality.\" ✨\n\nWe spoke to @CoStarAstrology founder and CEO Banu Guler about why people turn to the stars, and how to adapt a 4,000-year-old system into an app: apple.co/CoStarAstrology", media: Tweet.Media.ViewModel(image: UIImage(named: "tweet1"), size: CGSize(width: 514, height: 315)), retweetedBy: nil),
Tweet.ViewModel(id: UUID(), date: "3d", author: SampleModel.user1, text: "Prepare for a trip into the underworld! 😈\n\nIn Pinstripe you'll guide Tim as he navigates this dark realm, faces his inner demons, and deals with the actual suit-wearing demon who’s running the place: apple.co/Pinstripe", media: Tweet.Media.ViewModel(image: UIImage(named: "tweet2"), size: CGSize(width: 514, height: 315)), retweetedBy: nil),
Tweet.ViewModel(id: UUID(), date: "3d", author: SampleModel.user2, text: "Discover the top Apple Arcade games of 2021! 🎉⭐️\n\nFrom slam dunks in NBA 2K22 Arcade Edition to stealthy shenanigans in Sneaky Sasquatch, these games had us scoring, battling, and always laughing.\n\nPlay now: apple.co/topgames21", media: nil, retweetedBy: SampleModel.user1),
Tweet.ViewModel(id: UUID(), date: "3d", author: SampleModel.user2, text: nil, media: Tweet.Media.ViewModel(image: UIImage(named: "tweet4"), size: CGSize(width: 514, height: 315)), retweetedBy: SampleModel.user1),
Tweet.ViewModel(id: UUID(), date: "4d", author: SampleModel.user1, text: "2022 is the year you rethink what yoga can do. 🧘♀️\n\nAsana Rebel is a yoga-inspired workout app that caters to all fitness levels. Even if you don’t know your chakra from your elbow, it can help you lose weight, improve flexibility, and build strength: apple.co/-AsanaRebel", media: Tweet.Media.ViewModel(image: UIImage(named: "tweet5"), size: CGSize(width: 514, height: 315)), retweetedBy: nil)
]
}Table view
Next we want to setup the table view in our root view controller. In order to do that we first need to create a subclass for our cell view:
class TweetTableViewCell: UITableViewCell {

    override init(style: UITableViewCell.CellStyle, reuseIdentifier: String?) {
        super.init(style: style, reuseIdentifier: reuseIdentifier)

        self.setupView()
    }

    required init?(coder: NSCoder) {
        fatalError("init(coder:) has not been implemented")
    }

    private func setupView() {

    }

}
We’ll keep the class empty for now and return to it later on. Now we go back to our view controller file and initialize the table view along with the data source:
class RootViewController: UIViewController {

    private let cellId: String = "tweetCell"
    private let tableView = UITableView(frame: .zero, style: .plain)
    private lazy var dataSource = UITableViewDiffableDataSource<Int, Tweet.ViewModel>(tableView: self.tableView) { tableView, indexPath, tweet in
        let cell = tableView.dequeueReusableCell(withIdentifier: self.cellId, for: indexPath) as! TweetTableViewCell

        // todo: update the cell with the view model

        return cell
    }

    override func viewDidLoad() {
        super.viewDidLoad()

        self.view.backgroundColor = .systemBackground

        self.tableView.translatesAutoresizingMaskIntoConstraints = false
        self.tableView.register(TweetTableViewCell.self, forCellReuseIdentifier: self.cellId)
        self.tableView.dataSource = self.dataSource
        self.tableView.rowHeight = UITableView.automaticDimension // (1)
        self.tableView.estimatedRowHeight = UITableView.automaticDimension // (1)
        self.view.addSubview(self.tableView)
    }

}- Note we set the
rowHeightandestimatedRowHeightproperties toUITableView.automaticDimensionvalue, meaning our cells will be self–sizing and not have a fixed height.
Next we’ll add constraints for the table view in the setupView method. Once again we need a property to hold our active constraints to be able to deactivate them as needed when the size class changes:
private var activeConstraints: [NSLayoutConstraint] = []

...

private func setupView() {
    NSLayoutConstraint.deactivate(self.activeConstraints)
    self.activeConstraints.removeAll()

    if self.traitCollection.horizontalSizeClass == .regular {
        if UIDevice.current.orientation.isLandscape {
            // (1)
            self.activeConstraints.append(contentsOf: [
                self.tableView.widthAnchor.constraint(equalTo: self.view.widthAnchor, multiplier: 2 / 3),
                self.tableView.centerXAnchor.constraint(equalTo: self.view.centerXAnchor),
                self.tableView.topAnchor.constraint(equalTo: self.view.layoutMarginsGuide.topAnchor),
                self.tableView.bottomAnchor.constraint(equalTo: self.view.layoutMarginsGuide.bottomAnchor)
            ])
        } else {
            // (2)
            self.activeConstraints.append(contentsOf: [
                self.tableView.leadingAnchor.constraint(equalTo: self.view.leadingAnchor),
                self.tableView.trailingAnchor.constraint(equalTo: self.view.trailingAnchor),
                self.tableView.topAnchor.constraint(equalTo: self.view.layoutMarginsGuide.topAnchor),
                self.tableView.bottomAnchor.constraint(equalTo: self.view.layoutMarginsGuide.bottomAnchor)
            ])
        }
    } else {
        // (3)
        self.activeConstraints.append(contentsOf: [
            self.tableView.leadingAnchor.constraint(equalTo: self.view.leadingAnchor),
            self.tableView.trailingAnchor.constraint(equalTo: self.view.trailingAnchor),
            self.tableView.topAnchor.constraint(equalTo: self.view.layoutMarginsGuide.topAnchor),
            self.tableView.bottomAnchor.constraint(equalTo: self.view.layoutMarginsGuide.bottomAnchor)
        ])
    }

    NSLayoutConstraint.activate(self.activeConstraints)
}
We check the horizontal size class just like we did in the previous examples. Additionally we also check for the orientation when running in the regular environment to provide slightly different layout for landscape and portrait:
- In landscape orientation we limit the width of the table to 2⁄3 of the view controller and center it horizontally. Top and bottom anchors are constrainted to the layout margins guide.
- In portrait the table view width is not limited and spans from the leading to the trailing edge of the view controller's.
- For compact size class, we simply pin the leading and trailing anchors to the view controller's view, while the top and bottom anchors are pinned to the layout margins guide to prevent any safe area conflicts.
Now we have to call this method to get our constraints activated. Since our layout is dependent not only on the size class but also the current orientation, we won’t use the traitCollectionDidChange method this time, because the size class may not change when rotating an iPad and our method would not get called. Instead we’ll rely on viewWillTransition which will be called whenever the size of the view controller’s view is about to change:
 override func viewWillTransition(to size: CGSize, with coordinator: UIViewControllerTransitionCoordinator) {
    super.viewWillTransition(to: size, with: coordinator)

    self.setupView()
}
Additionally we’ll also call this method in viewDidLayoutSubviews to activate the constraints when the view controller is initialized for the first time. We need to wait for the first layout pass to ensure the device orientation is reporting the correct value (for example it may be incorrect in the viewDidLoad method):
private var isInitialized: Bool = false

...

override func viewDidLayoutSubviews() {
    super.viewDidLayoutSubviews()

    if !self.isInitialized {
        self.isInitialized = true

        self.setupView()
    }
}
Finally we’ll create a snapshot of our view model and apply it to our data source to populate the table view. We can do this at the end of the viewDidLoad method:
private var viewModel: [Tweet.ViewModel] = SampleModel.tweets

...

override func viewDidLoad() {
    super.viewDidLoad()

    ...

    var snapshot = NSDiffableDataSourceSnapshot<Int, Tweet.ViewModel>()
    snapshot.appendSections([0])
    snapshot.appendItems(self.viewModel, toSection: 0)

    self.dataSource.apply(snapshot, animatingDifferences: false, completion: nil)
}
This concludes the setup for the table view and we can move on to creating the layout of our cells!
Table view cell layout
Switch over to the TweetTableViewCell.swift file and add the following views:
class TweetTableViewCell: UITableViewCell {

    private let avatarView = UIImageView()
    private let displayNameLabel = UILabel()
    private let userNameLabel = UILabel()
    private let dateLabel = UILabel()
    private let contentStack = UIStackView()
    private var tweetTextLabel: UILabel?
    private var mediaView: UIImageView?

    ...

}
Note that tweetTextLabel and mediaView are optional since a tweet may not have any text or media (though we assume there is always at least one of these). Here’s the breakdown of the views:
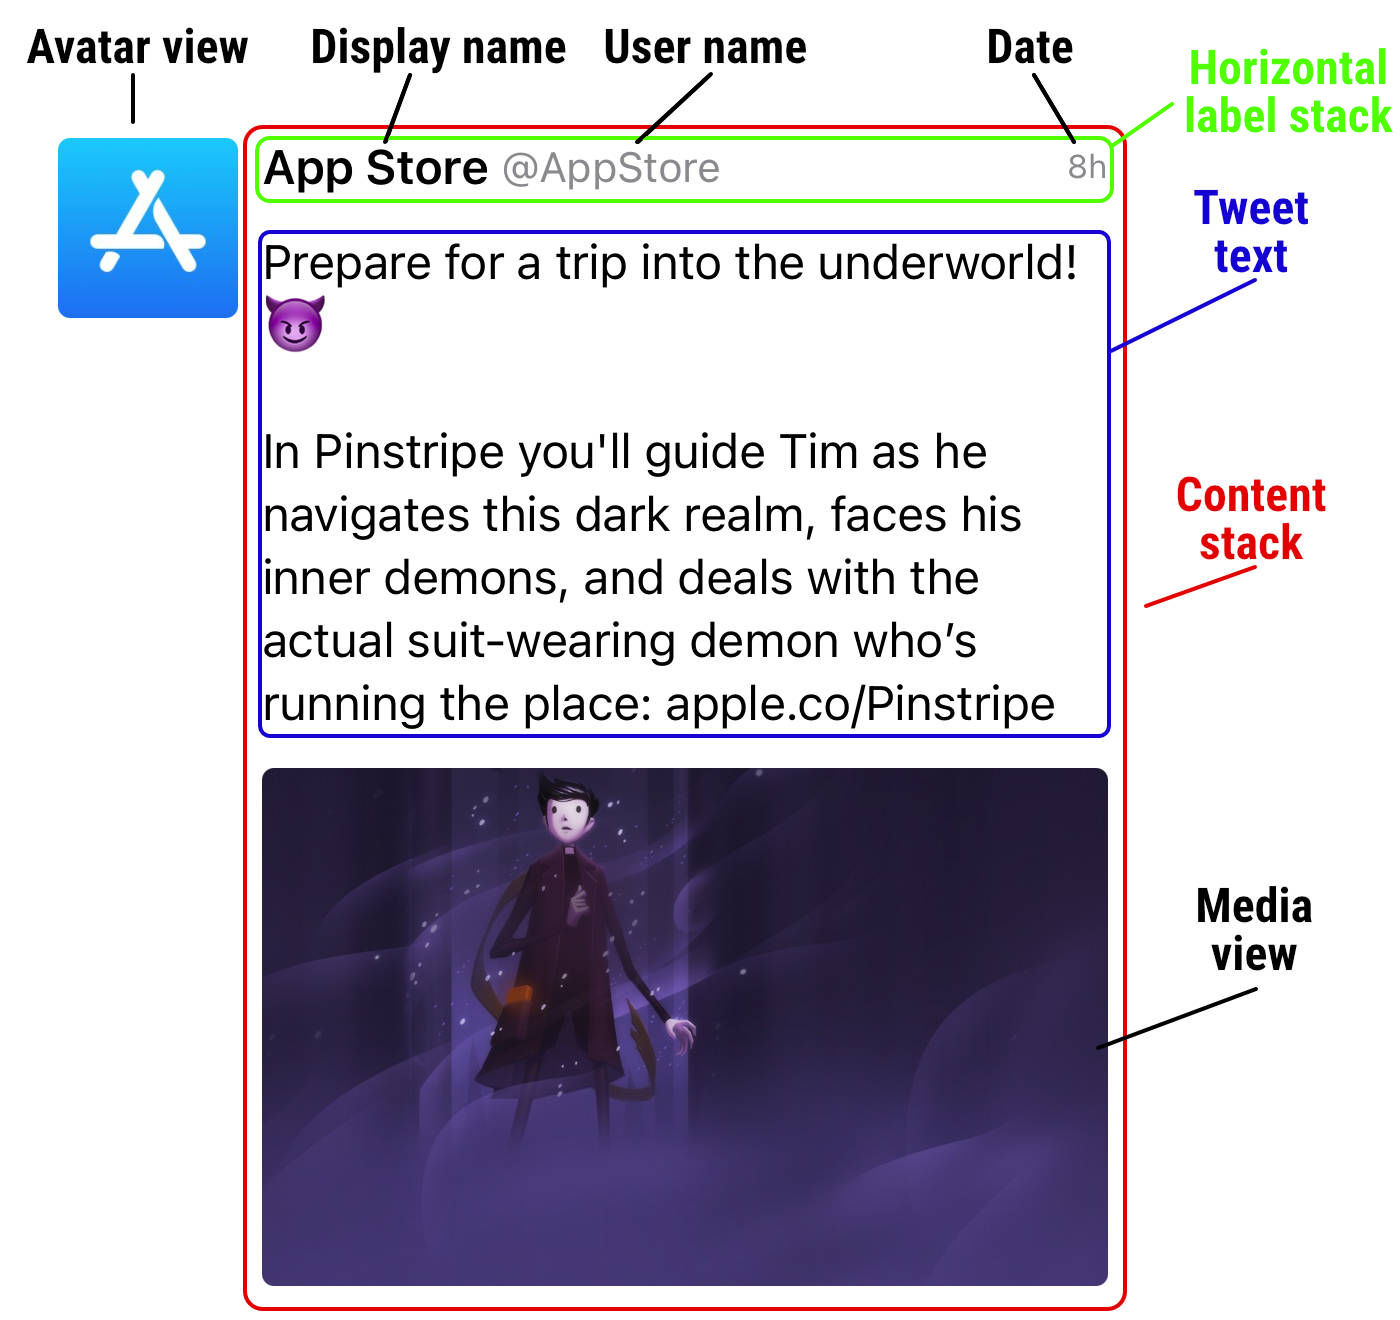
The horizontal label stack doesn’t need to be defined as a member property since its contents will remain the same during the cell’s lifecycle. We’ll create this stack view locally within the setupView method later.
Let’s start by initializing the avatar view:
private func setupView() {
    self.avatarView.translatesAutoresizingMaskIntoConstraints = false
    self.avatarView.layer.cornerRadius = 4
    self.avatarView.layer.masksToBounds = true
    self.avatarView.contentMode = .scaleAspectFill
    self.avatarView.setContentHuggingPriority(.defaultHigh, for: .horizontal) // (1)
    self.contentView.addSubview(self.avatarView)

    NSLayoutConstraint.activate([
        self.avatarView.leadingAnchor.constraint(equalTo: self.contentView.layoutMarginsGuide.leadingAnchor), // (2)
        self.avatarView.topAnchor.constraint(equalTo: self.contentView.layoutMarginsGuide.topAnchor), // (2)
        self.avatarView.widthAnchor.constraint(equalToConstant: 60), // (3)
        self.avatarView.heightAnchor.constraint(equalToConstant: 60), // (3)
        self.avatarView.bottomAnchor.constraint(lessThanOrEqualTo: self.contentView.layoutMarginsGuide.bottomAnchor) // (4)
    ])
}- The content hugging priority is increased to avoid stretching the view. We'll want the content stack to fill the remaining space horizontally.
- We pin the leading and top anchors to the layout margins guide of the content view to have it appear in the top left corner of the cell.
- The size is fixed to a constant of
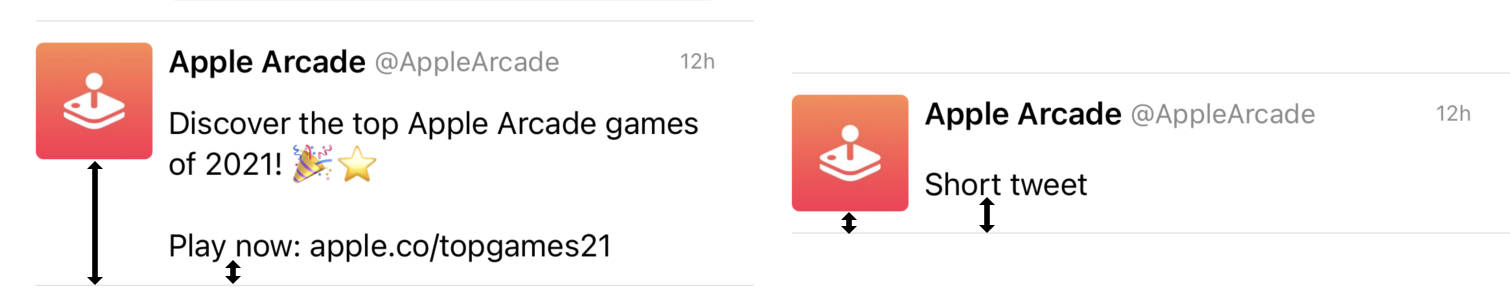
60points. - We make sure the bottom of the avatar view is never greater than the bottom of the cell (to prevent it from appearing outside). At the same time we want to allow for the avatar's bottom anchor to be less than that of the cell, since in most cases the tweet content will be taller than the avatar. To handle this we use the inequality constraint. In the rare case where the tweet text is only a word or two, the avatar could end up being taller than the content and thus it should be the one to determines the cell's height.
We continue by initializing the content stack view that will hold our tweet’s author and date labels as well as the tweet content.
self.contentStack.axis = .vertical
self.contentStack.alignment = .leading
self.contentStack.spacing = 12
self.contentStack.setContentHuggingPriority(.defaultLow, for: .horizontal) // (1)
self.contentStack.setContentCompressionResistancePriority(.defaultLow, for: .horizontal) // (1)
self.contentStack.translatesAutoresizingMaskIntoConstraints = false
self.contentView.addSubview(self.contentStack)

// (2)
NSLayoutConstraint.activate([
    self.contentStack.leadingAnchor.constraint(equalTo: self.avatarView.trailingAnchor, constant: 8),
    self.contentStack.trailingAnchor.constraint(equalTo: self.contentView.layoutMarginsGuide.trailingAnchor),
    self.contentStack.topAnchor.constraint(equalTo: self.contentView.layoutMarginsGuide.topAnchor),
    self.contentStack.bottomAnchor.constraint(equalTo: self.contentView.layoutMarginsGuide.bottomAnchor)
])- The content hugging and compression resistance priorities are lowered to have the stack view stretched to fill all the available space in the cell view (instead of the avatar view that has a fixed size).
- The leading edge is constrainted to the trailing edge of the avatar view to have it positioned right next to it. The remaining constraints pin the stack view to the cell's layout margin guide to have a little bit of whitespace around the content.
We finish off by adding a nested horizontal stack view for the labels to display the user names and the date. This stack view is added to the main vertical content stack:
let labelsStack = UIStackView()
labelsStack.axis = .horizontal
labelsStack.spacing = 4
self.contentStack.addArrangedSubview(labelsStack)
labelsStack.widthAnchor.constraint(equalTo: self.contentStack.widthAnchor).isActive = true // (1)

self.displayNameLabel.font = UIFont.preferredFont(forTextStyle: .headline)
self.displayNameLabel.textColor = .label
self.displayNameLabel.setContentHuggingPriority(.defaultHigh, for: .horizontal)
labelsStack.addArrangedSubview(self.displayNameLabel)

self.userNameLabel.font = UIFont.preferredFont(forTextStyle: .subheadline)
self.userNameLabel.textColor = .secondaryLabel
self.userNameLabel.setContentHuggingPriority(.defaultLow, for: .horizontal) // (2)
self.userNameLabel.setContentCompressionResistancePriority(.defaultLow, for: .horizontal) // (2)
labelsStack.addArrangedSubview(self.userNameLabel)

self.dateLabel.font = UIFont.preferredFont(forTextStyle: .caption1)
self.dateLabel.textColor = .secondaryLabel
self.dateLabel.setContentHuggingPriority(.defaultHigh, for: .horizontal)
labelsStack.addArrangedSubview(self.dateLabel)- We are using
leadingalignment on the main content stack, thus we need to explicitly set the width of the nested stack view to have it fill all the available space horizontally (otherwise it would take on the exact size of its subviews — the labels). - We lower the priorities for the user name label to have it stretched and compressed as needed, which results in the date label being pushed all the way to the trailing edge.
That’s it for the setup. Now we’ll create a method to update the cell with our tweet view model and display or hide the text/media views as necessary:
func update(viewModel: Tweet.ViewModel) {
    // (1)
    self.avatarView.image = viewModel.author.avatar
    self.userNameLabel.text = viewModel.author.username
    self.displayNameLabel.text = viewModel.author.displayName
    self.dateLabel.text = viewModel.date

    // (2)
    if let text = viewModel.text {
        self.addTweetText(text)
    } else {
        self.removeTweetText()
    }

    // (3)
    if let media = viewModel.media {
        self.addTweetMedia(media)
    } else {
        self.removeTweetMedia()
    }
}- The non–optional views have their data set immediately.
- Then we check whether the tweet contains a text and if so we create and add the
tweetTextLabelto the content stack (we'll see this in a bit). If the text does not exist, the text label is removed. - We process the media in a similar fashion, see below for details.
To display the tweet text, we simply initialize the label if it doesn’t already exist and insert it to the content stack at index 1, meaning it will appear after the horizontal labels stack. We also add a width constraint to have the label fill the entire available space and allow it to span over multiple lines by setting the numberOfLines property to zero. The removeTweetText method removes the label from the superview when it’s not needed:
private func addTweetText(_ text: String) {
if self.tweetTextLabel == nil {
self.tweetTextLabel = UILabel()
self.tweetTextLabel?.font = UIFont.preferredFont(forTextStyle: .body)
self.tweetTextLabel?.textColor = .label
self.tweetTextLabel?.numberOfLines = 0
self.contentStack.insertArrangedSubview(self.tweetTextLabel!, at: 1)
self.tweetTextLabel?.widthAnchor.constraint(equalTo: self.contentStack.widthAnchor).isActive = true
}
self.tweetTextLabel?.text = text
}
private func removeTweetText() {
guard let label = self.tweetTextLabel else { return }
self.tweetTextLabel = nil
label.removeFromSuperview()
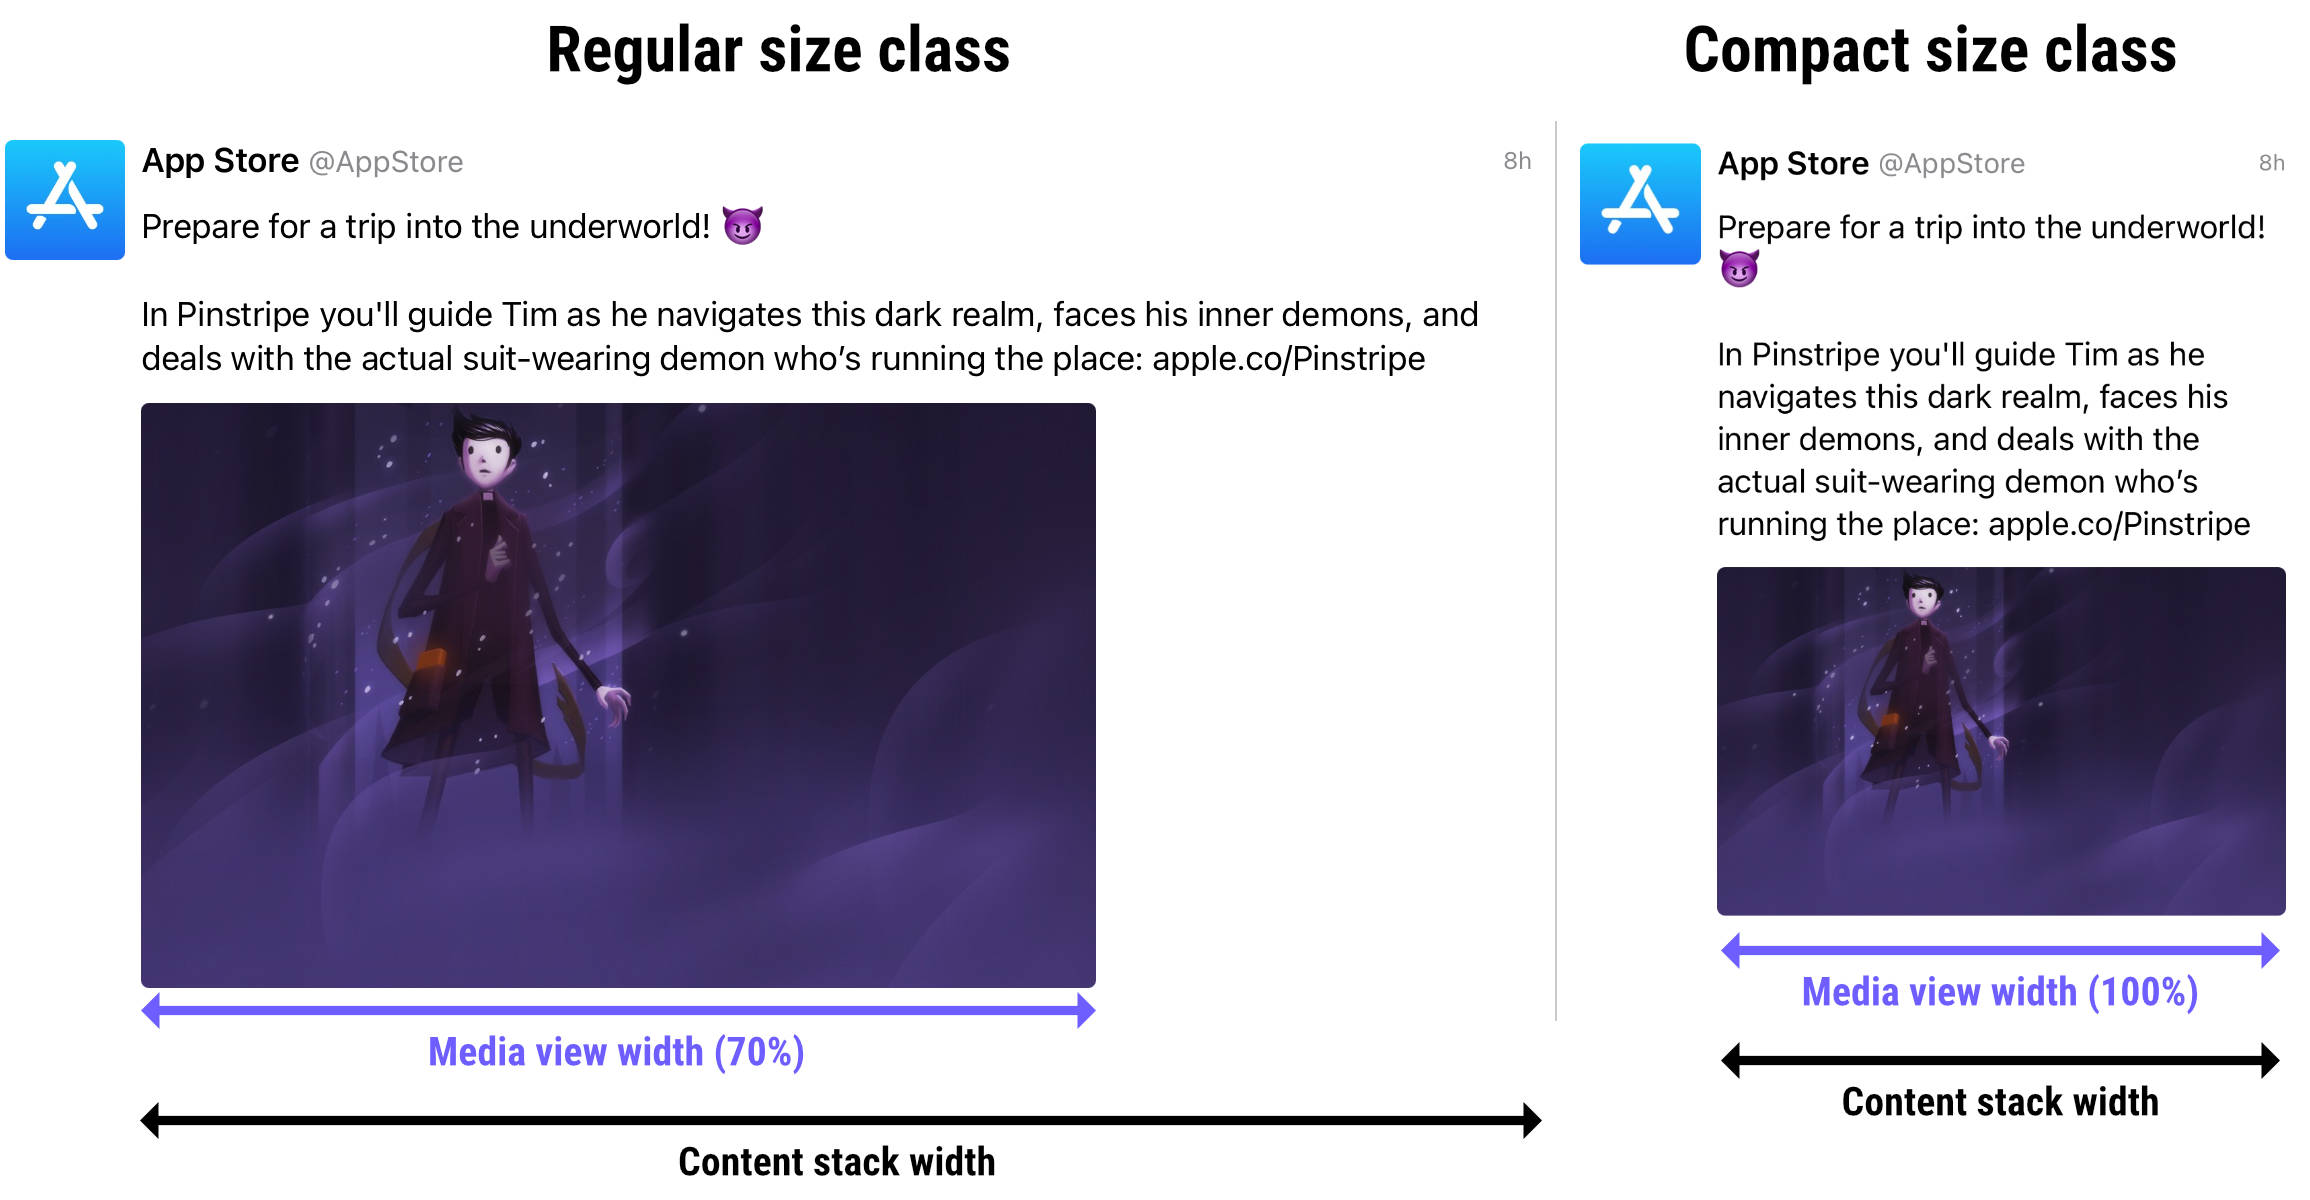
}For the media view, we have the following requirements:
- If possible, it should take on the natural size of the image being displayed.
- For regular size class, it should fill at most 70% of the content stack width.
- For compact size class, it can be at most as wide as the content stack.
Since we need to react to a potential change of the size class at runtime, we’ll need to store the active constraints for the media view. At the same time we should also keep a reference to the media view model to know the size of the image, thus we add two more member properties:
private var mediaConstraints: [NSLayoutConstraint]?
private var media: Tweet.Media.ViewModel?
In the update method we store the reference to the media view model:
func update(viewModel: Tweet.ViewModel) {
    ...

    self.media = viewModel.media

    ...
}
Next we create the methods to initalize the media view if needed. In this case we also check if the tweet text label exists to ensure the image is displayed after any potential tweet text. We also call the updateMediaConstraints to setup the view’s constraints:
private func addTweetMedia(_ media: Tweet.Media.ViewModel) {
    if self.mediaView == nil {
        self.mediaView = UIImageView()
        self.mediaView?.layer.cornerRadius = 4
        self.mediaView?.layer.masksToBounds = true

        let insertIndex: Int = (self.tweetTextLabel == nil) ? 1 : 2
        self.contentStack.insertArrangedSubview(self.mediaView!, at: insertIndex)
    }

    self.mediaView?.image = media.image

    self.updateMediaConstraints(media)
}

private func removeTweetMedia() {
    guard let view = self.mediaView else { return }

    self.mediaView = nil
    view.removeFromSuperview()

    self.mediaConstraints = nil
}
Before we get to the constraints, let’s define an extension for NSLayoutConstraint inside the cell file to be able to set constraint’s priority and return the constraint on a single line:
fileprivate extension NSLayoutConstraint {

    func withPriority(_ priority: UILayoutPriority) -> NSLayoutConstraint {
        self.priority = priority
        return self
    }

}
Finally the constraints for the media view are as follows:
private func updateMediaConstraints(_ media: Tweet.Media.ViewModel) {
    if let constraints = self.mediaConstraints {
        NSLayoutConstraint.deactivate(constraints)
    }

    // Default constraints for both regular and compact size classes
    self.mediaConstraints = [
        self.mediaView!.widthAnchor.constraint(equalToConstant: media.size.width).withPriority(.defaultHigh), // (1)
        self.mediaView!.heightAnchor.constraint(equalTo: self.mediaView!.widthAnchor, multiplier: media.size.height / media.size.width) // (2)
    ]

    if self.traitCollection.horizontalSizeClass == .regular {
        self.mediaConstraints?.append(
            self.mediaView!.widthAnchor.constraint(lessThanOrEqualTo: self.contentStack.widthAnchor, multiplier: 0.7) // (3)
        )
    } else {
        self.mediaConstraints?.append(
            self.mediaView!.widthAnchor.constraint(lessThanOrEqualTo: self.contentStack.widthAnchor) // (4)
        )
    }

    NSLayoutConstraint.activate(self.mediaConstraints!)
}- The width constraint is set to the natural width of the image we are displaying, however with an optional priority of
high. If the image is wider than the available space (as constrainted by the other required width constraint(3)or(4)), the optional constraint will not be enforced by Auto Layout. Instead it will try to satisfy this constraint as best as it can. - The height constraint is set to equal the view's width constraint and multiplying it by the height to width ratio, effectively making the image retain its aspect ratio.
- For regular size class the width is limited to 70% of the content stack width.
- For compact size class the width matches the width of the content stack.
Constraints (3) and (4) are using inequality so that the image is allowed to be smaller than the available space.
(1) since we are using preloaded UIImage and Auto Layout automatically sets the size constraints based on the size of the image. However if we were loading the image from a server setting the width constraint explicitly allows Auto Layout to measure the cell size before the image gets loaded.
We also must not forget to update the media constraints when the size class changes by overriding the traitCollectionDidChange method:
override func traitCollectionDidChange(_ previousTraitCollection: UITraitCollection?) {
    super.traitCollectionDidChange(previousTraitCollection)

    if let media = self.media, previousTraitCollection?.horizontalSizeClass != self.traitCollection.horizontalSizeClass {
        self.updateMediaConstraints(media)
    }
}
And we are done! Finally we need to make sure we actually call the cell’s update method when we prepare the cell for display. Let’s go back to our view controller file and add the update call to the diffable data source:
private lazy var dataSource = UITableViewDiffableDataSource<Int, Tweet.ViewModel>(tableView: self.tableView) { tableView, indexPath, tweet in
    let cell = tableView.dequeueReusableCell(withIdentifier: self.cellId, for: indexPath) as! TweetTableViewCell

    cell.update(viewModel: tweet)

    return cell
}
Build and run the project to see the table view come to life! The cells are automatically sized to match the content, no matter if the tweet contains a text, image, or both.
"Retweeted by" view
As a final touch we’ll add a view to the bottom of the tweet to indicate a retweet:
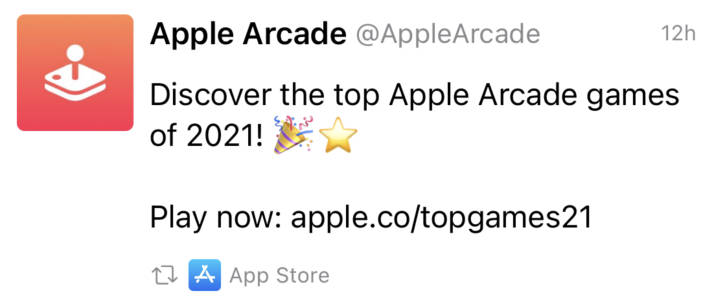
Create a new file with a subclass of UIStackView:
class RetweetedByView: UIStackView {

    init() {
        super.init(frame: .zero)

        self.setupView()
    }

    required init(coder: NSCoder) {
        fatalError("init(coder:) has not been implemented")
    }

    private func setupView() {

    }

}
Next we’ll add three views for the retweet icon and the avatar and name of the user who made the retweet:
private let iconView = UIImageView()
private let avatarView = UIImageView()
private let displayNameLabel = UILabel()
In the setupView method we initialize the stack view’s properties and add our subviews to the stack:
private func setupView() {
    // (1)
    self.axis = .horizontal
    self.alignment = .center
    self.spacing = 4

    // (2)
    let config = UIImage.SymbolConfiguration(textStyle: .caption1)
    let icon = UIImage(systemName: "arrow.2.squarepath", withConfiguration: config)

    self.iconView.image = icon
    self.iconView.tintColor = .secondaryLabel
    self.iconView.setContentHuggingPriority(.defaultHigh, for: .horizontal)
    self.addArrangedSubview(self.iconView)

    // (3)
    self.avatarView.setContentHuggingPriority(.defaultHigh, for: .horizontal)
    self.avatarView.layer.masksToBounds = true
    self.addArrangedSubview(self.avatarView)

    // (4)
    self.displayNameLabel.font = UIFont.preferredFont(forTextStyle: .caption1)
    self.displayNameLabel.textColor = .secondaryLabel
    self.displayNameLabel.setContentHuggingPriority(.defaultLow - 1, for: .horizontal)
    self.displayNameLabel.setContentCompressionResistancePriority(.defaultLow - 1, for: .horizontal)
    self.addArrangedSubview(self.displayNameLabel)

    // (5)
    let avatarSize: CGFloat = self.displayNameLabel.font.pointSize * 1.5

    NSLayoutConstraint.activate([
        self.avatarView.heightAnchor.constraint(equalToConstant: avatarSize),
        self.avatarView.widthAnchor.constraint(equalToConstant: avatarSize)
    ])
}- We make the stack view horizontal with a half the standard spacing and make the subviews align vertically.
- We add a static symbol to the
iconViewand set its content hugging priority to high to avoid stretching it. - The avatar also shouldn't be stretched so we set a high content hugging priority. We mask the layer's bounds to allow creating rounded corners, which we'll do in a moment.
- The last subview is the label and it has the lowest content hugging and compression resistance priorities to have it stretched and compressed as needed to fill and fit the available space within the stack view.
- We use the label's font size as a base value for the avatar's size and add constraints to fix its size.
We want to round the corners of the avatarView. We need to know the view’s bounds in order to do that, therefore we override the layoutSubviews method:
override func layoutSubviews() {
    super.layoutSubviews()

    self.avatarView.layer.cornerRadius = self.avatarView.bounds.width * 0.2
}
Finally we add a method to update the view with our view model:
func update(viewModel: Tweet.User.ViewModel) {
    self.avatarView.image = viewModel.avatar
    self.displayNameLabel.text = viewModel.displayName
}
Now we’ll return to the file with our custom cell class and add our new "retweeted by" view:
class TweetTableViewCell: UITableViewCell {

    private var retweetedByView: RetweetedByView?

    ...

}
At the end of the update method we check if the retweetedBy property exists on the view model and either add the view or remove it from the content stack, no constraints necessary:
func update(viewModel: Tweet.ViewModel) {
    ...

    if let retweet = viewModel.retweetedBy {
        self.addRetweetedByView(retweet)
    } else {
        self.removeRetweetedByView()
    }
}

...

private func addRetweetedByView(_ user: Tweet.User.ViewModel) {
    if self.retweetedByView == nil {
        self.retweetedByView = RetweetedByView()
        self.contentStack.addArrangedSubview(self.retweetedByView!)
    }

    self.retweetedByView?.update(viewModel: user)
}

private func removeRetweetedByView() {
    guard let view = self.retweetedByView else { return }

    view.removeFromSuperview()
    self.retweetedByView = nil
}
We can build and run and see our final layout in action!
Source code
Complete source code for this and all the other examples is available on GitHub.
Where to next
- Intro
- Basics, Part One
- Basics, Part Two
- Xcode Setup
- Sign Up Screen
- Stack Views
- Custom UIAlert
- Players Profile
- Twitter Timeline (reading now)
- Twitter Profile
- Music Album